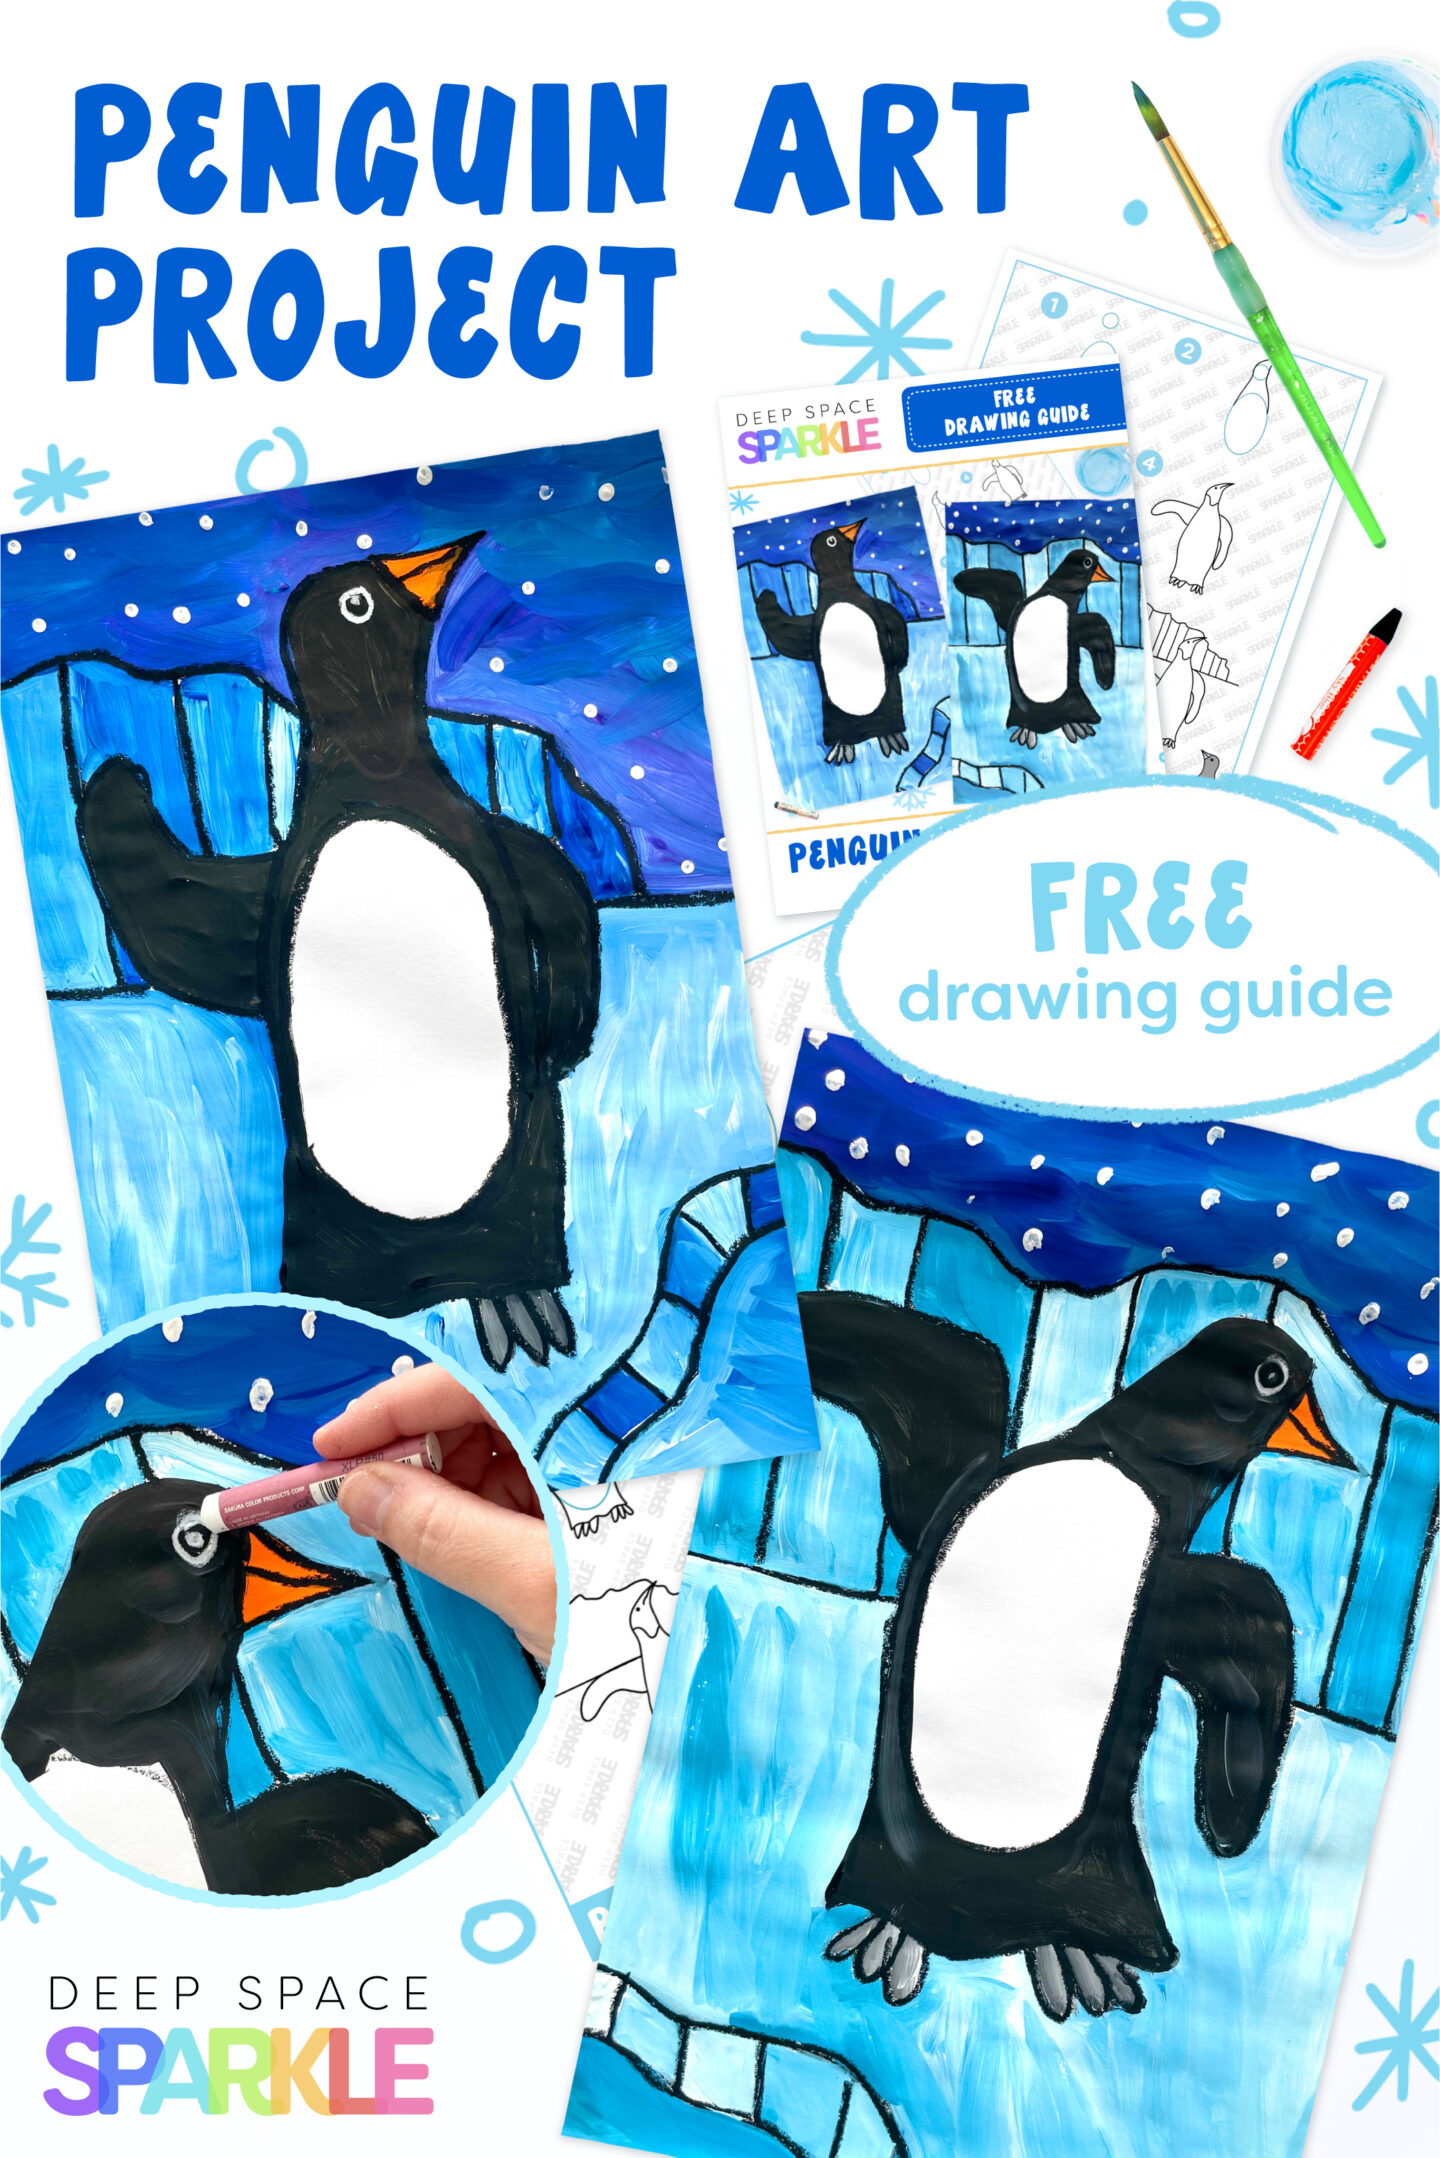
Tacky the Penguin Art Project Penguin Feet and Beak Template
Penguins are a popular request in first and second grade. Students study Antarctica and are quite familiar with penguins and their habitat. Once students see how easily they tin draw a penguin using a base of simple shapes, this lesson is sure to exist a fan favorite.
What You'll Need:
– 12″ x 18″ white sulphite paper
– Black & white oil pastels
– Liquid tempera paint (white, blue, purple, black, orange)
– Medium round paintbrush
HOW TO DRAW A PENGUIN
I brainstorm the lesson by showing the kids how to draw a penguin. I place many pictures of penguins on the white lath then the children can add their own details. Equally I give the sit-in, I offer plenty of "options" so that each painting will be uniquely theirs.
We've created a handy drawing guide for you to use to describe the penguin. Download yours hither: (Note: We recommend downloading the freebie using Chrome or Safari)

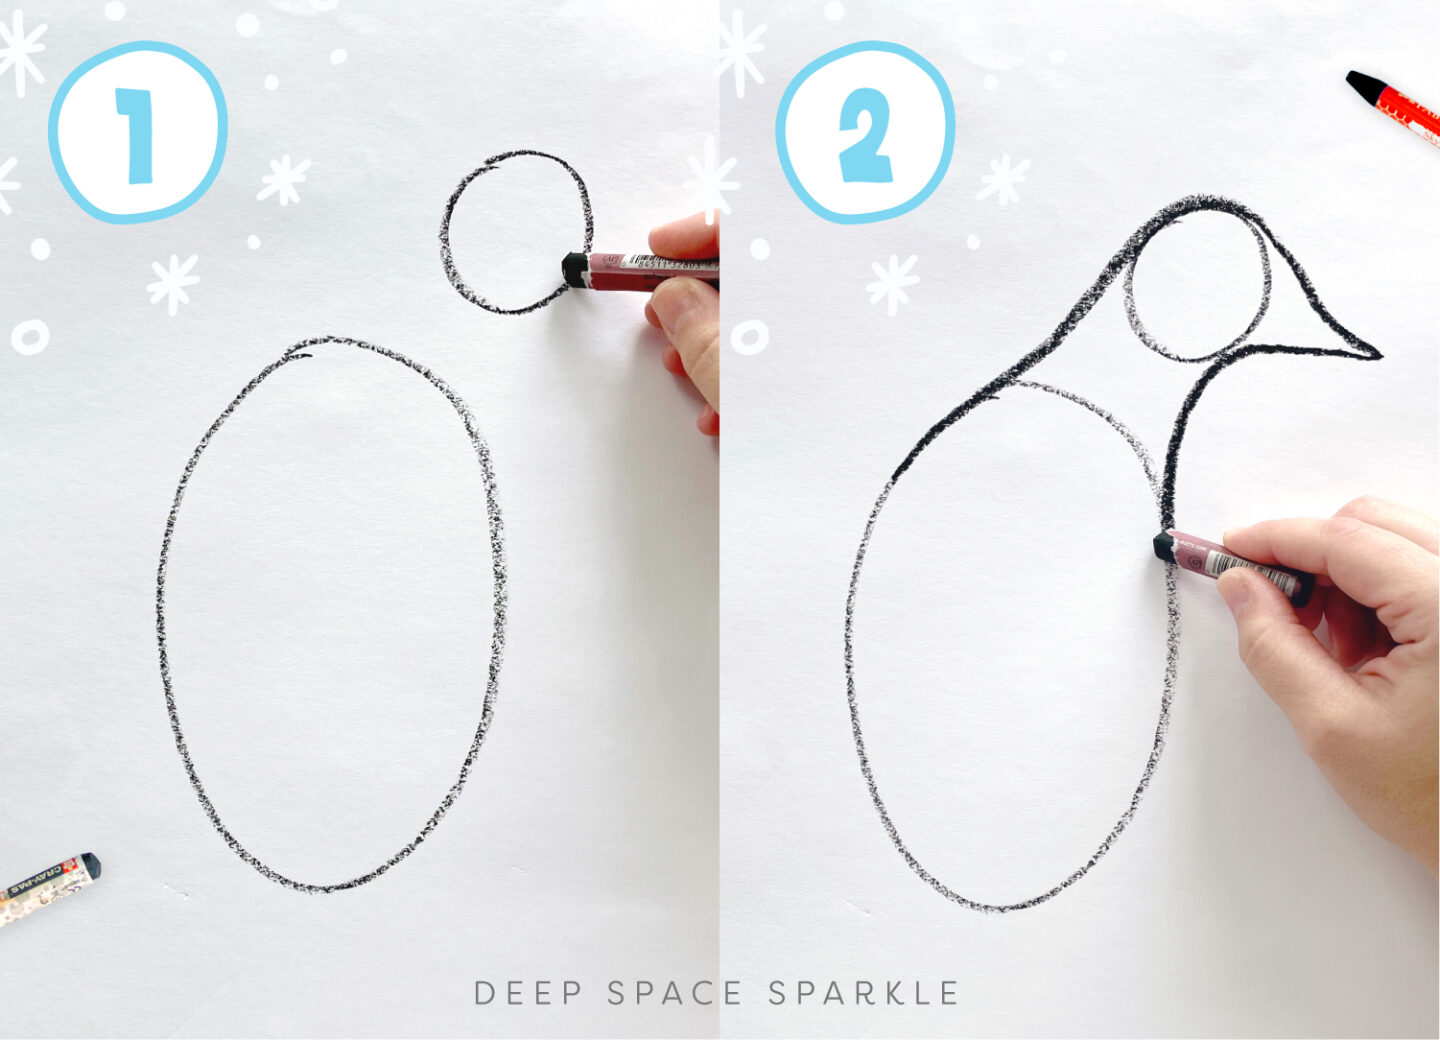
Using a black oil pastel, draw ane large oval for the body and 1 modest circle for the head.
Connect these shapes with ii svelte lines for the neck. When I demonstrate this step, I prove how you can identify the small circle for the caput off to the side. Once yous connect the head and the body, it will look like the penguin is craning its neck.
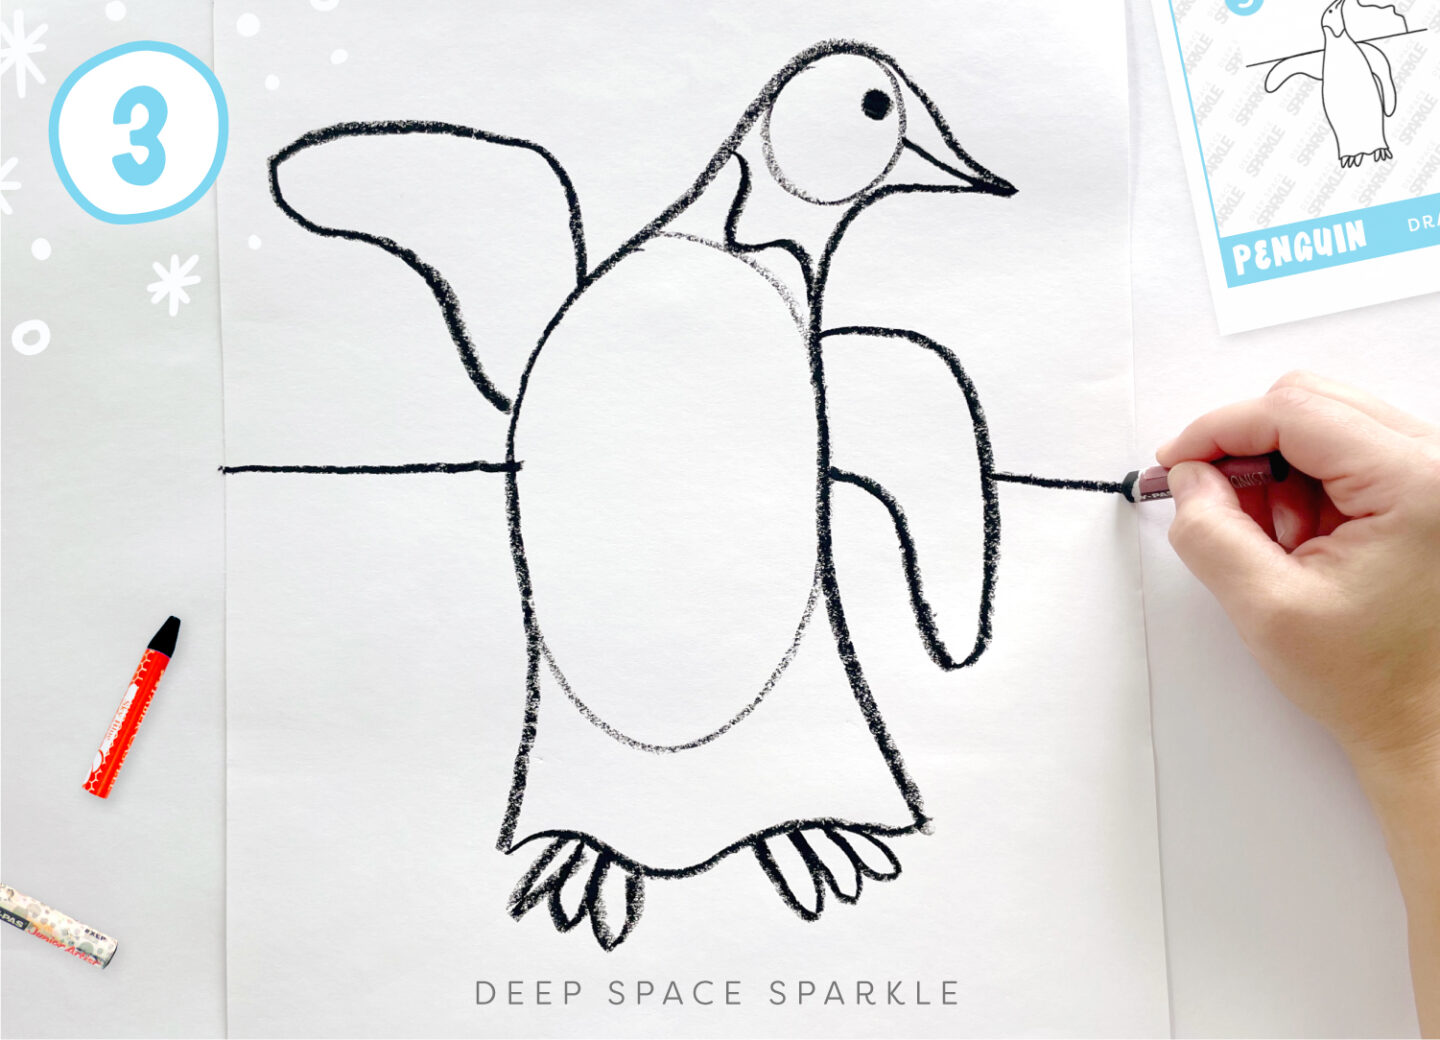
Stop off the bottom of the torso and add some feet peeking out below.
Add wings. Demonstrate a few unlike options for the wings; they can be downward to the side, waving up in the air, or a combination of both. If y'all give students freedom on this step, yous'll be surprised how creative they tin be.
BACKGROUND
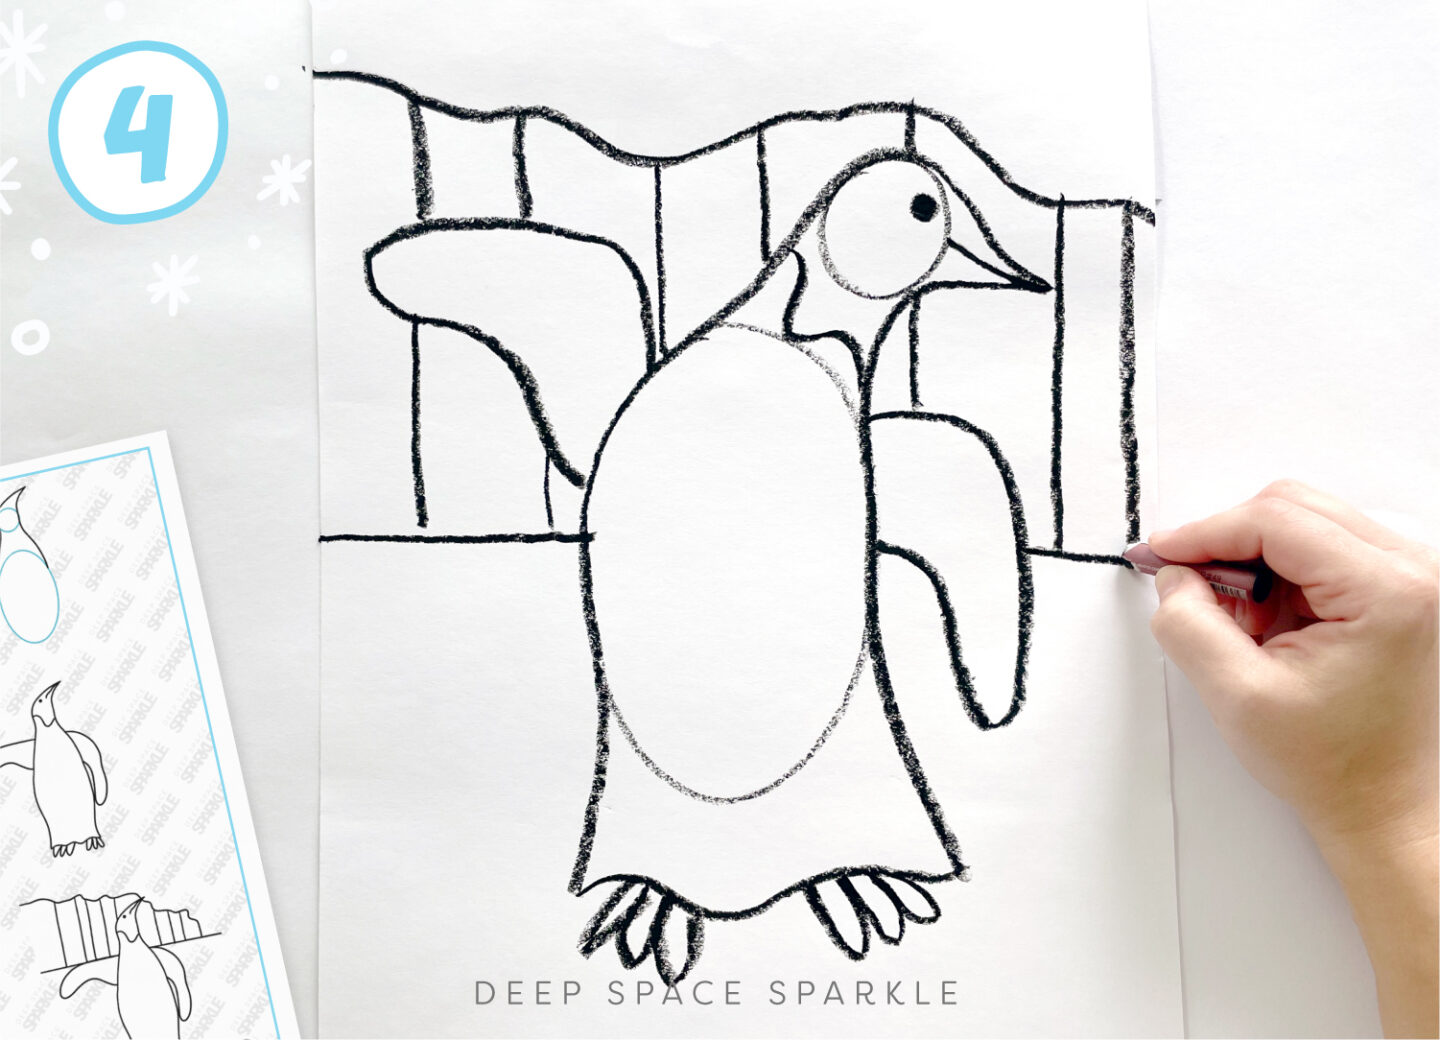
Next, draw an iceberg or an water ice shelf in the groundwork. To do this, draw a horizon line first near the center of the page.
I give the selection to draw half an iceberg or i that extends all the way across the paper. Either manner, the top of the iceberg is a wavy line. Add some vertical lines from the acme of the iceberg to the horizon line.
Some children volition want to depict a hole in the ice. I similar to prove them how to brand the ice await like it has shape. To practise this, draw another "ring" around the hole and describe vertical lines connecting both rings.
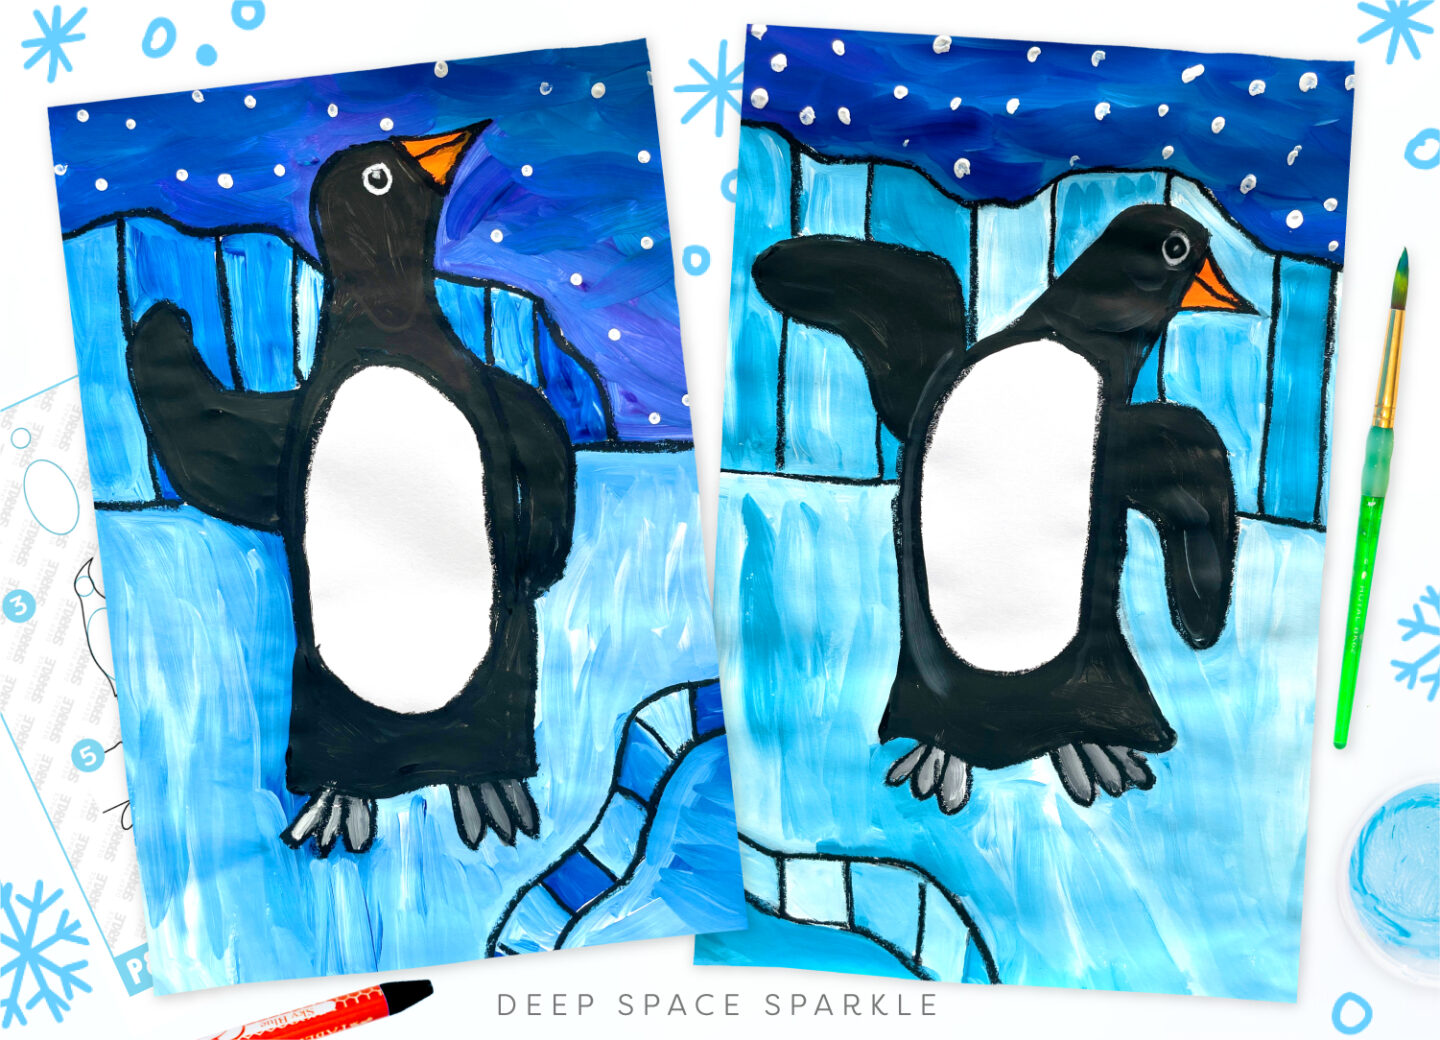
PAINTING
Despite wanting to dip into the blackness paint first for the penguins, I tell children that it helps to paint the bill first, then the ice, the sky and finally the penguins. This way, the messy black paint won't dirty up the crystal blue ice or the beautiful night sky.
Pigment the pecker orange.
Equally you motion on to the water ice, utilize the double-dipping technique with blue and white pigment to create varying tints of blueish in the water ice shelf.
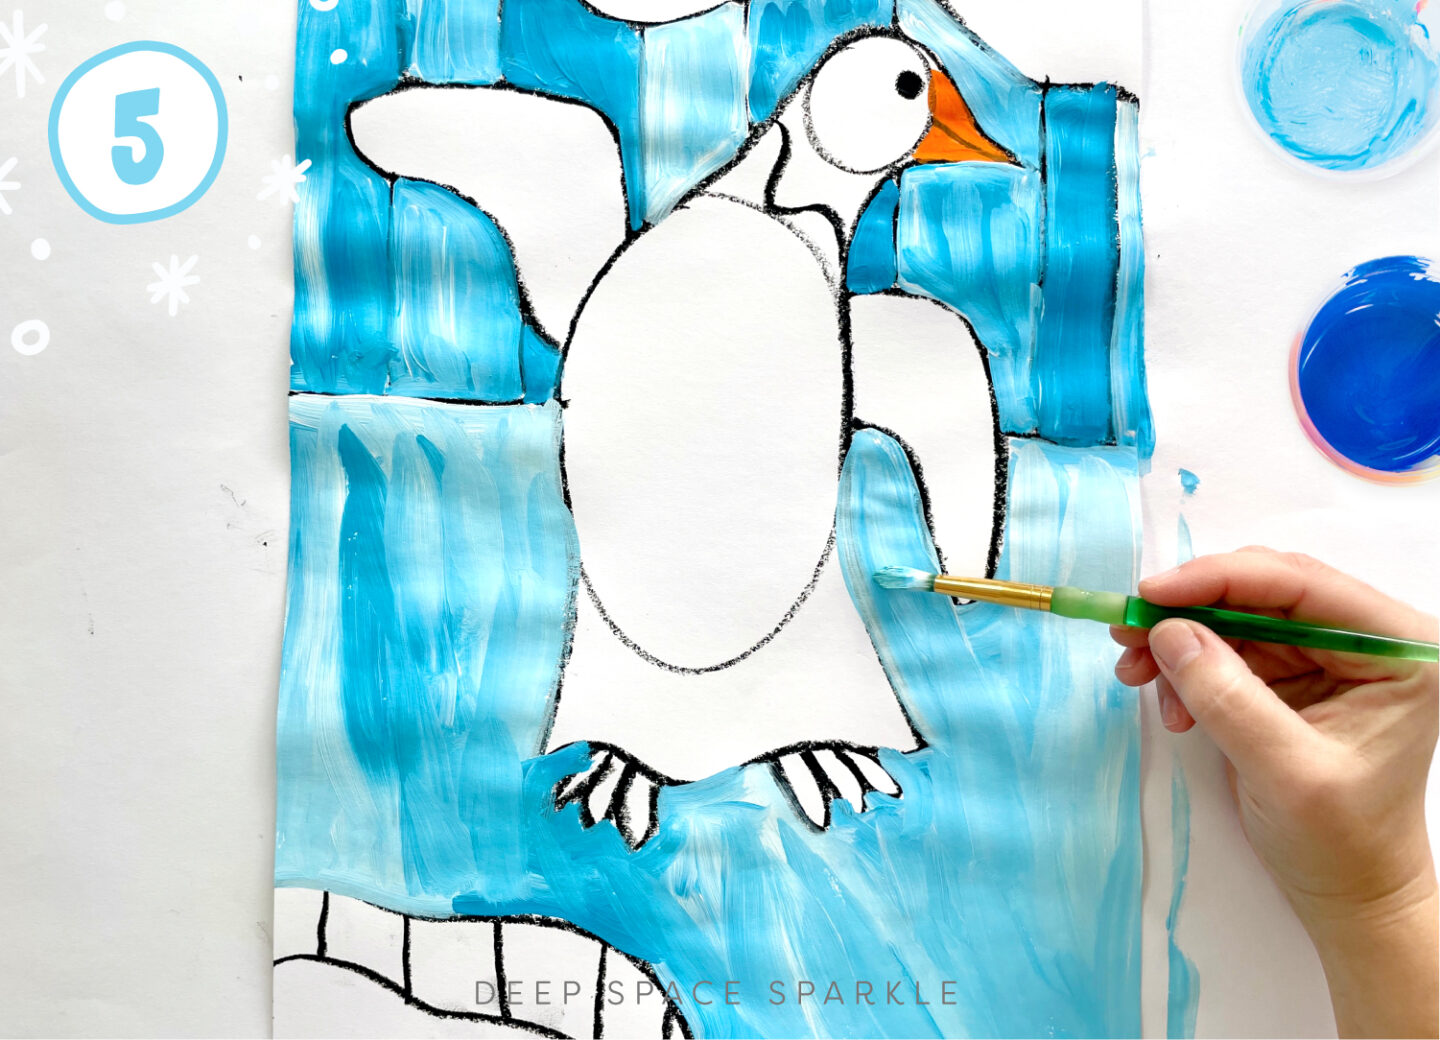
DOUBLE LOADING TECHNIQUE
Dip your paintbrush into one color, so over again into another. Employ both colors to the paper without over-mixing. Role of the fun of this technique is the experimentation of using different amounts of each color to see what happens. For case, a large dip of blue, then a tiny dip into white will yield a different outcome than a big dip of white and tiny dip into bluish.
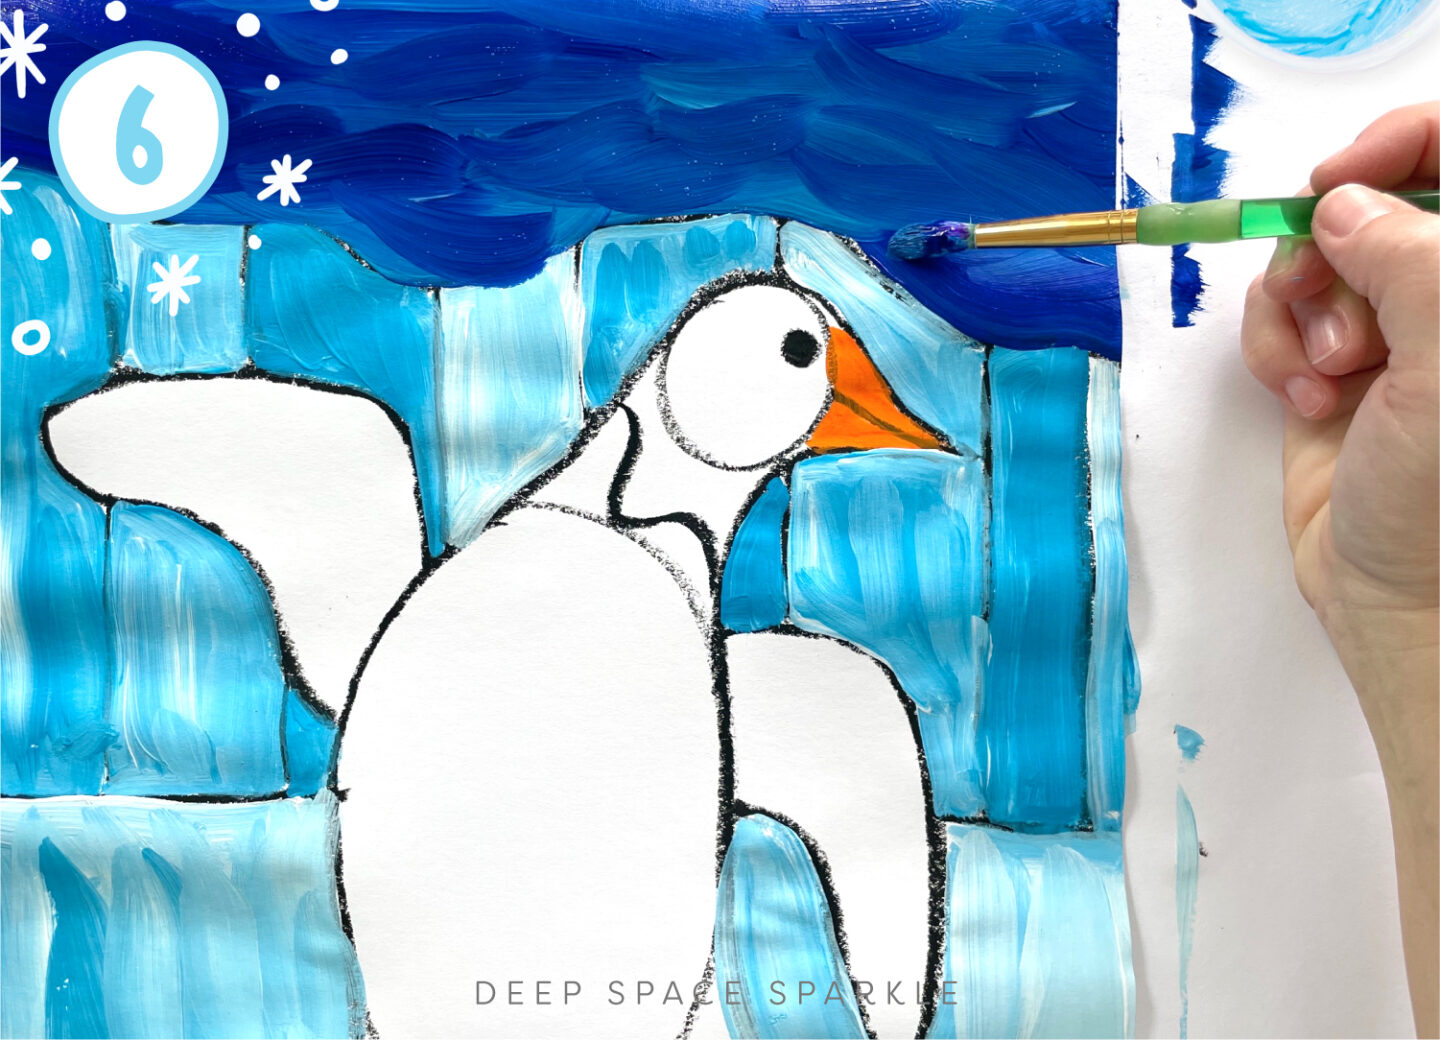
Proceed to paint the night sky using dark colors like purple and dark blueish.
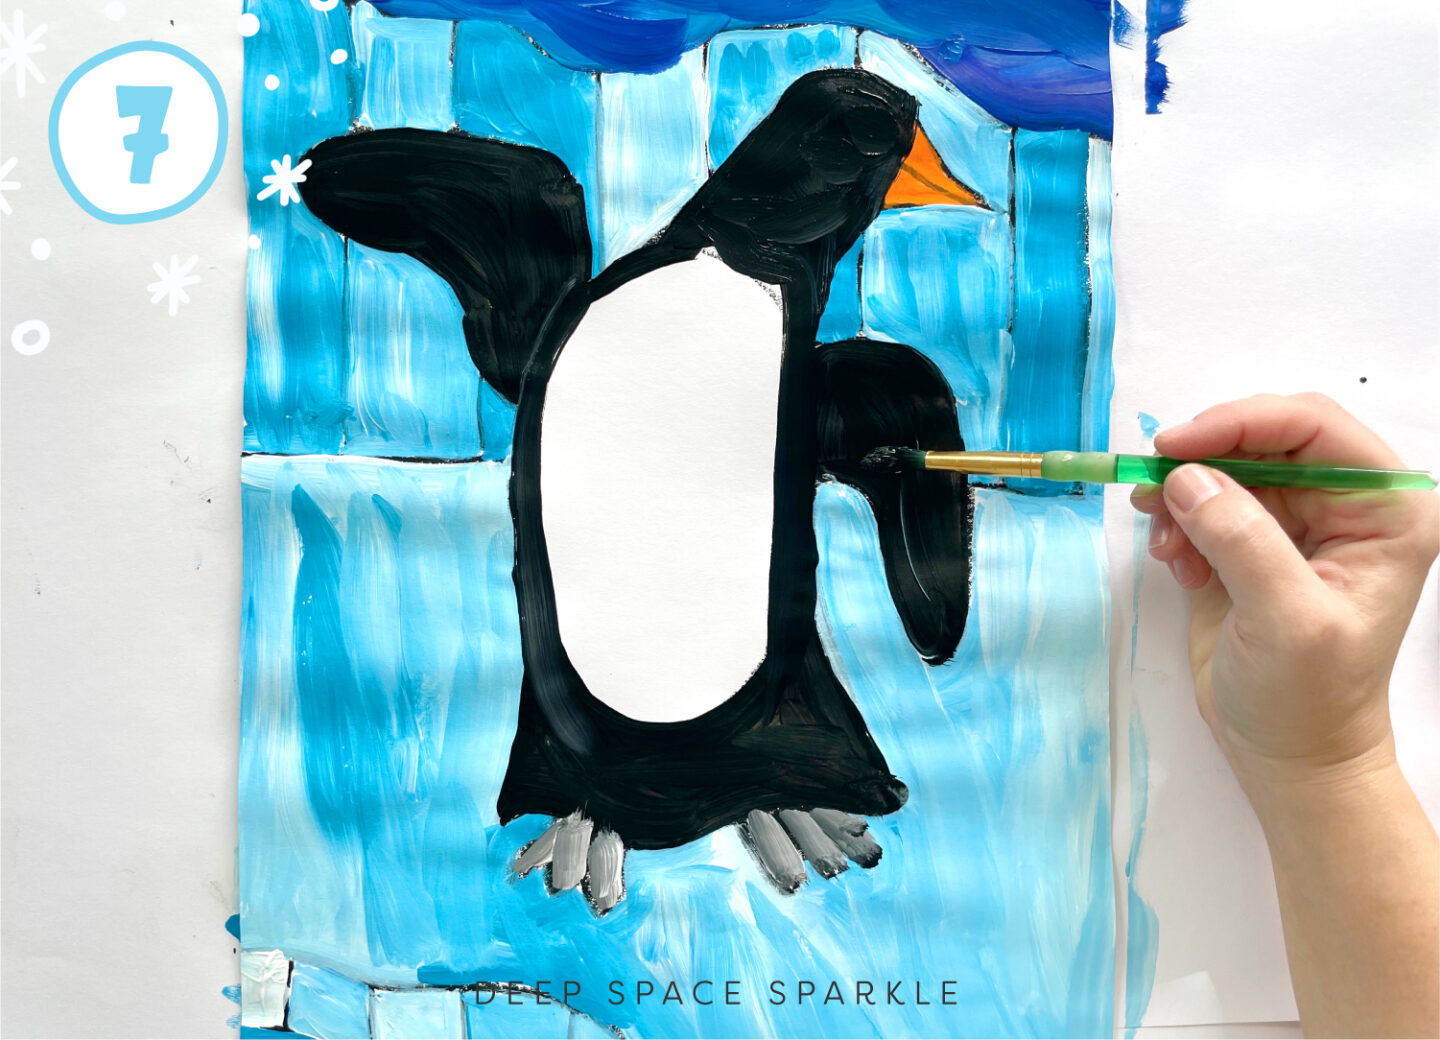
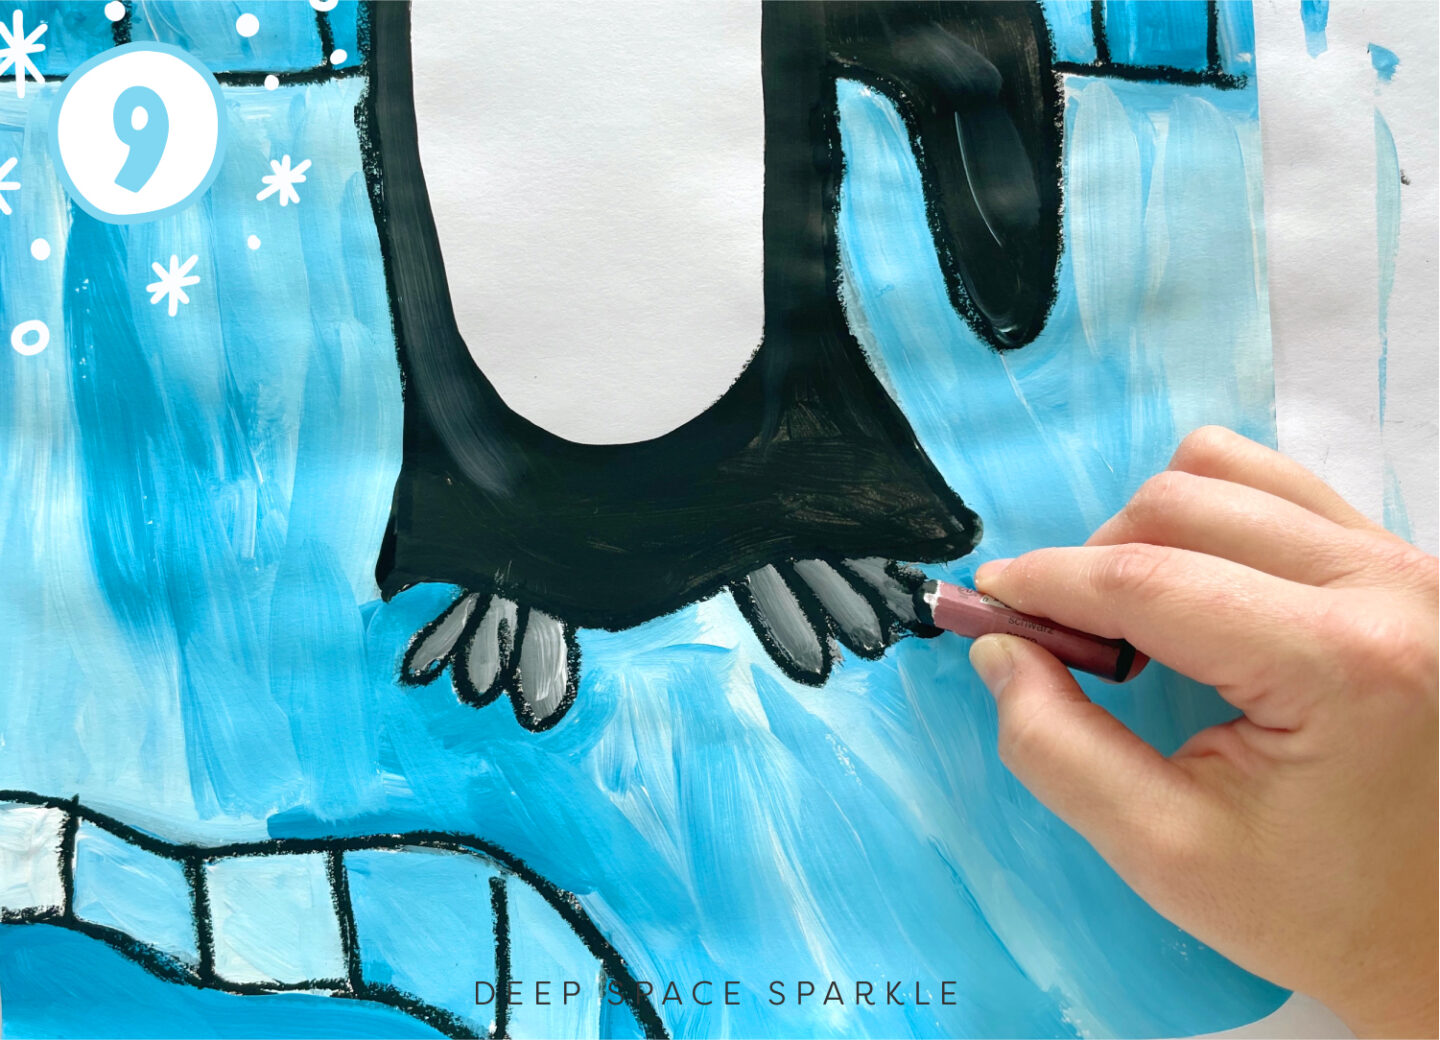
Next, add the blackness to the penguin, leaving the belly white. To make the grey anxiety, double load the paintbrush with blackness and white.
Finally, add some pure white stars twinkling in the night sky. If your paintbrush is too dirty, y'all can dip the dorsum terminate of it in paint to make the stars instead.
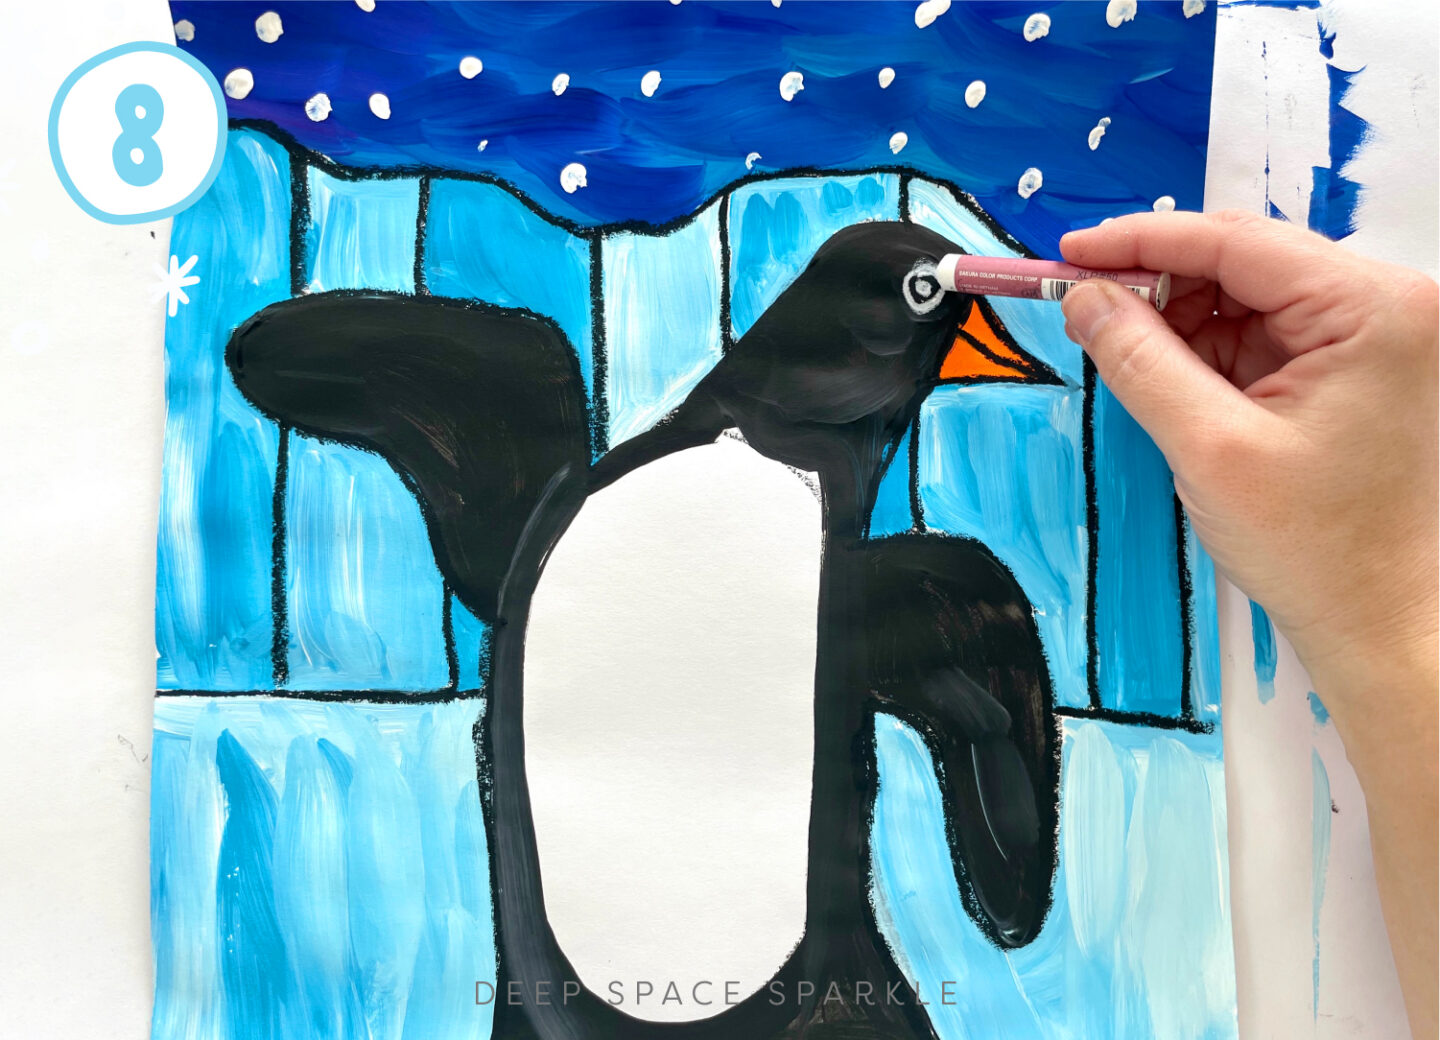
When the painting is dry, apply the blackness oil pastel to trace over all the black lines. You can use the white oil pastel to draw the eye back in if it has been painted over.
Want more in-depth lessons with accompanying standards and assessments for similar projects? The Sparklers' Club has thousands of fully standardized lesson plans to make curriculum planning effortless. Join the waitlist for the Sparklers Club!
Pin Me!
Source: https://www.deepspacesparkle.com/penguin-at-night-art-project/
0 Response to "Tacky the Penguin Art Project Penguin Feet and Beak Template"
Enviar um comentário